Call (613) 912-7508

Home/Our work

Labeled application gallery

Real work.
Explained.

See 15 spray foam insulation applications across attics, foundations, garages, walls, and new construction. Each example explains spray foam preparation, insulation details, and building-envelope goals.

Control heat loss at the top

Attics & Rooflines

Four views of roof-deck preparation, active installation, and finished attic coverage.

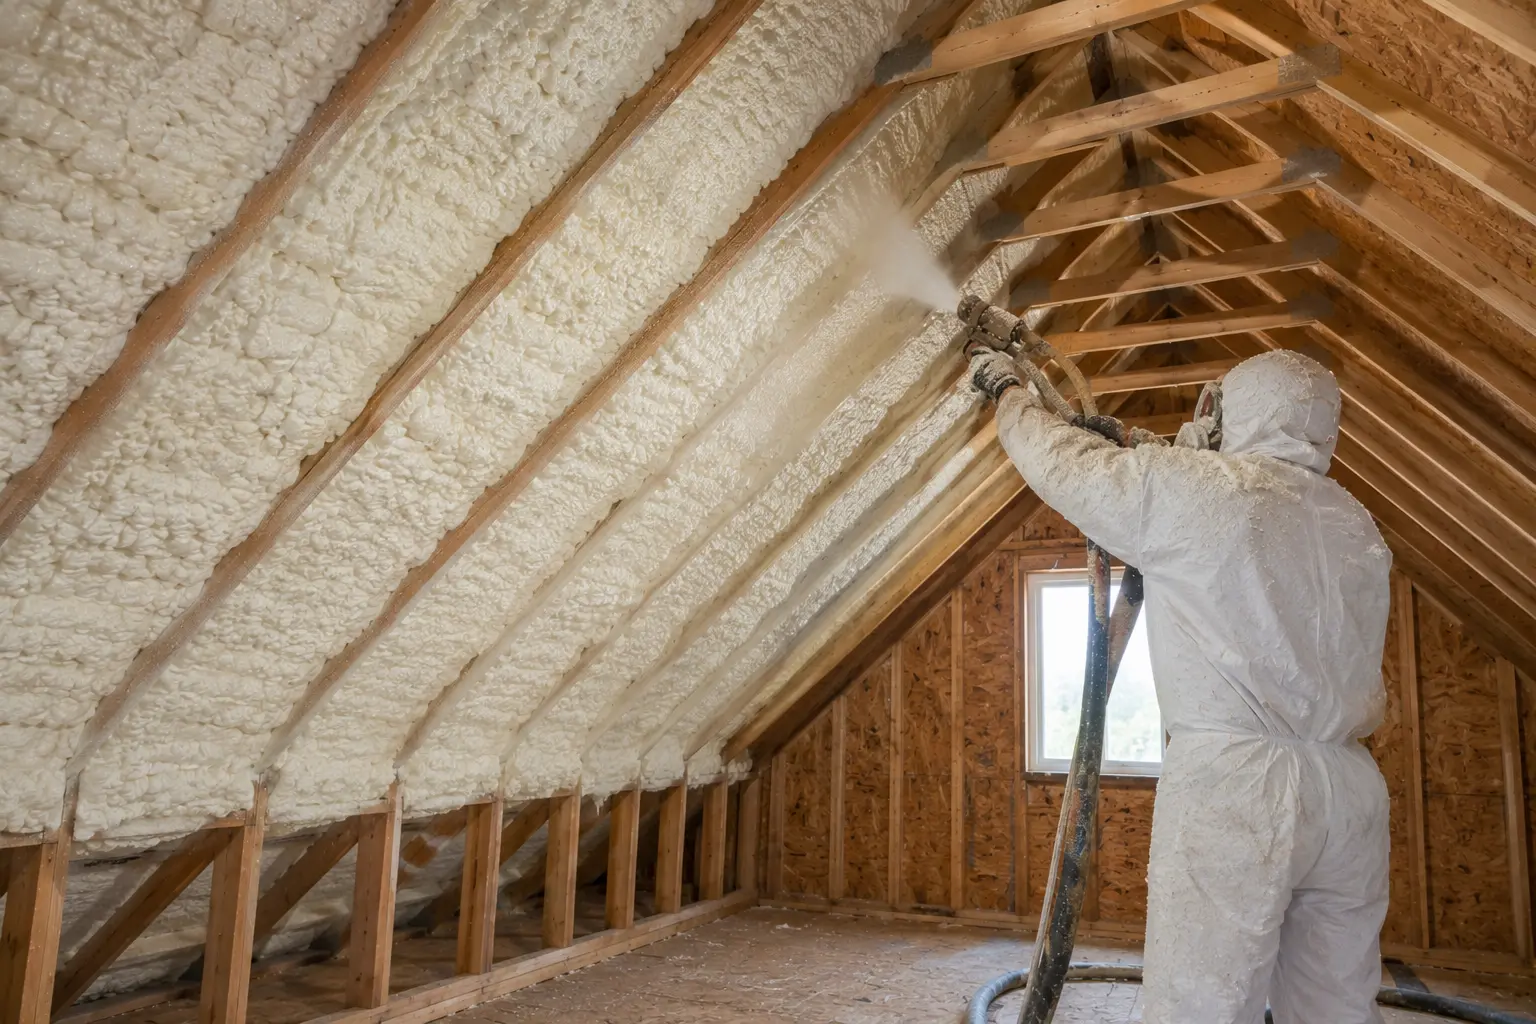
Installer applying spray foam insulation across an attic roof deck
01.01Attic Insulation

Photo details

Attic Insulation

This attic installation shows spray foam being applied directly to the underside of the roof deck between exposed rafters. Working at the roofline can bring the attic closer to the conditioned part of the building, which is especially useful when ductwork, mechanical equipment, storage, or future finished space is located above the ceiling. The installer builds coverage in controlled passes so the foam can expand and follow the uneven surfaces around framing members. Before a project like this begins, the roof assembly, ventilation approach, existing insulation, wiring, and penetrations all need to be reviewed. Proper protection and ventilation are also essential while the material is installed and cured. The finished result is intended to create a more continuous thermal and air-control layer than pieces of insulation fitted around each obstruction. That continuity can help reduce drafts, limit unwanted air movement, and support steadier temperatures on the upper floor throughout Belleville’s changing seasons.

Ask about this application
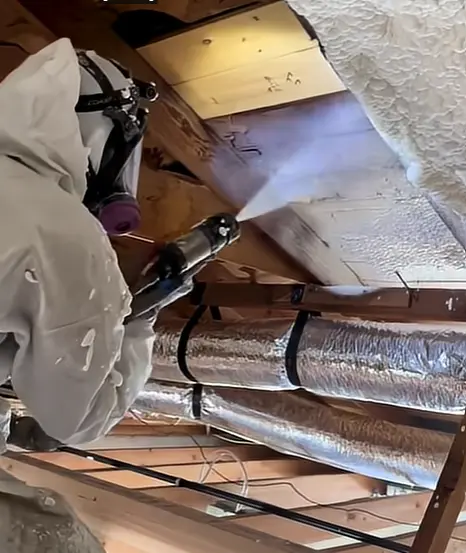
Installer spraying foam around attic rafters and nearby ductwork
01.02Attic Rafters Spray

Photo details

Attic Rafters Spray

This close working view highlights the detailed part of insulating an existing attic: fitting continuous coverage around rafters, roof sheathing, ducts, wiring, and other interruptions. Attic retrofits rarely present large, perfectly open surfaces, so careful gun control and a clear installation plan matter. The applicator works across each bay while maintaining safe separation from components that must remain accessible or require clearance. Spray foam’s ability to expand in place makes it well suited to irregular junctions where rigid boards or fibrous insulation may be difficult to fit without seams. The goal is not simply to fill visible cavities; it is to connect the roofline, end walls, and transitions into a deliberate building-envelope strategy. Before spraying, the crew assesses moisture conditions, ventilation details, and any repairs that should happen first. Once installed at the specified depth and properly protected where required, the foam can help reduce air leakage and improve comfort in rooms directly below the attic.

Ask about this application
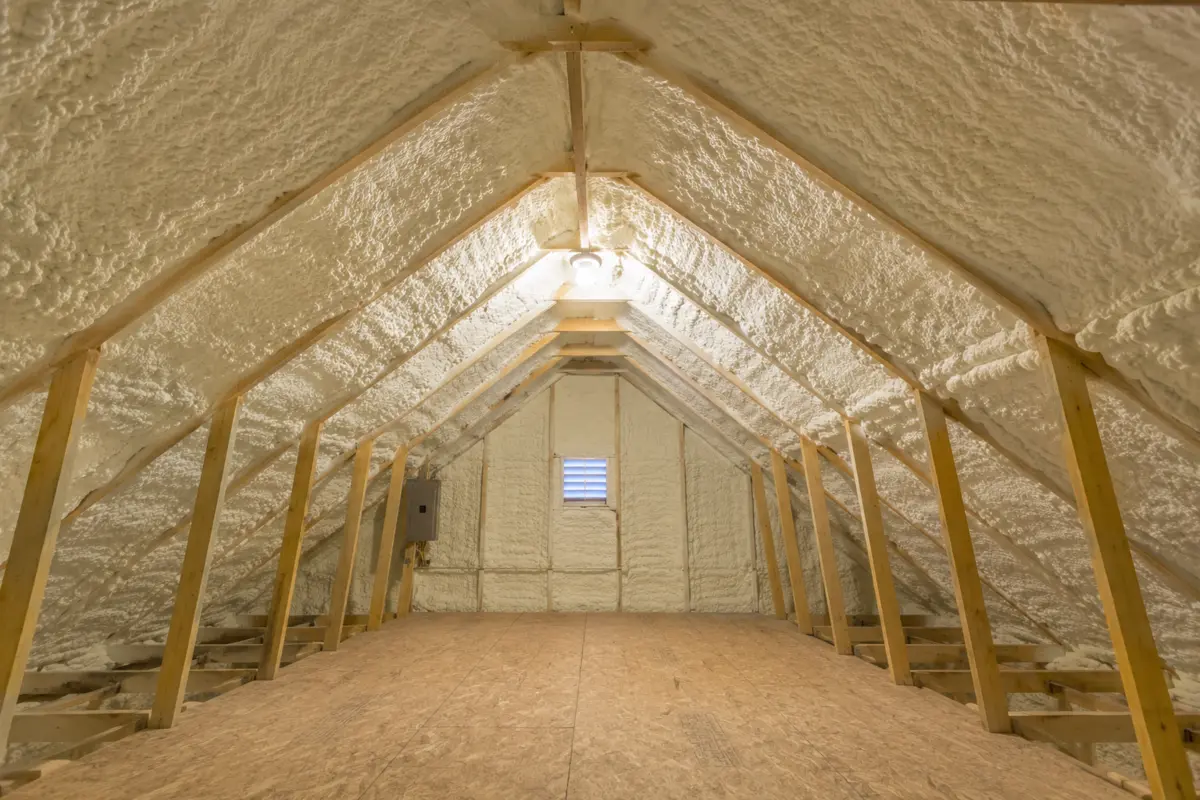
Finished attic with continuous spray foam coverage along roof slopes and end wall
01.03Finished Attic Spray Foam

Photo details

Finished Attic Spray Foam

This finished attic provides a clear look at what continuous roofline insulation can resemble after the spraying stage is complete. Foam follows both sloped roof planes, fills the spaces between framing, and continues across the end wall to help connect the enclosure. The visible texture is normal for field-applied spray foam, which expands and cures in place rather than arriving as a factory-cut panel. Consistent coverage is more important than a perfectly smooth appearance in an unfinished attic. A project at this stage should still be reviewed for specified depth, adhesion, missed areas, clearances, and any protective coating or thermal barrier required for the intended use. Electrical components and service points also need to remain identifiable and accessible. By locating the thermal boundary at the roof deck, the assembly can reduce uncontrolled air exchange between the attic and outdoors. That may help upper rooms feel more stable while placing attic equipment and storage within a more moderated environment.

Ask about this application
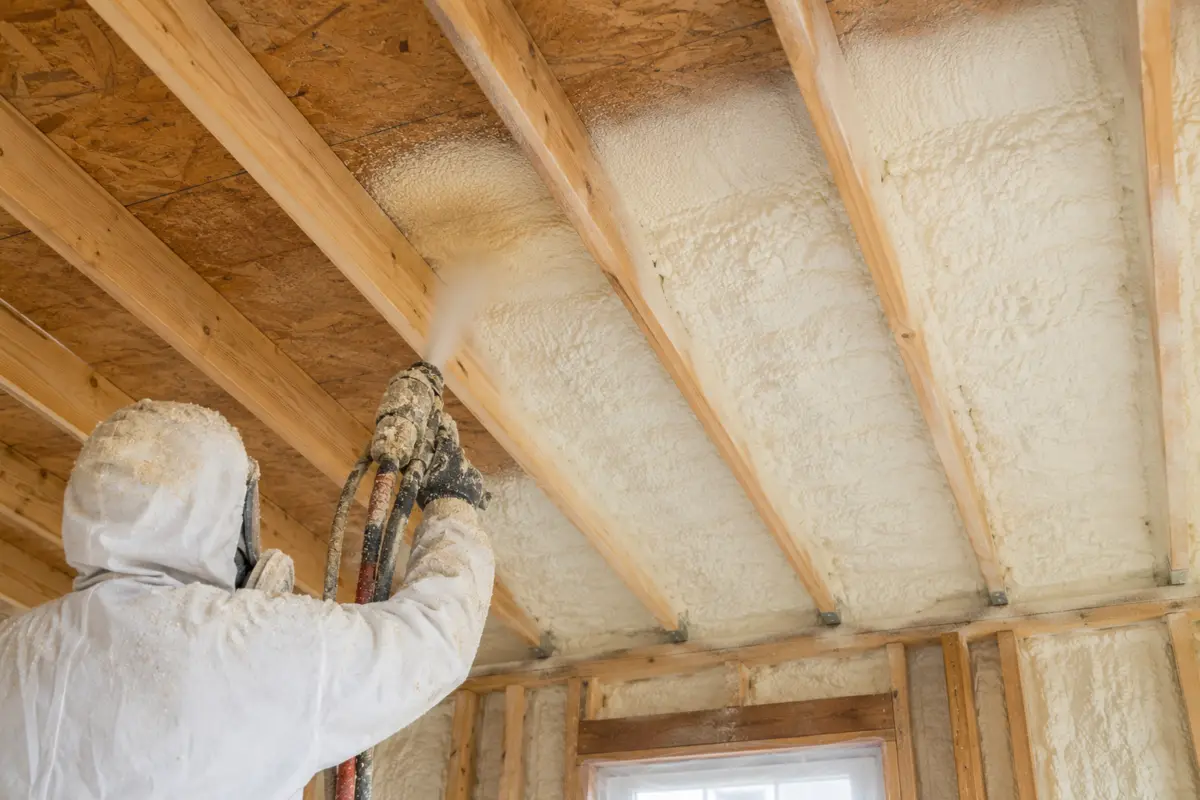
Installer applying spray foam between timber roof rafters
01.04Spray Foam on Roof

Photo details

Spray Foam on Roof

This roof application shows how an installer works bay by bay to build an insulated layer against the underside of the sheathing. Each pass is placed between the timber rafters, allowing the foam to expand, adhere to the substrate, and join the coverage already installed beside it. The open framing makes it possible to inspect the sheathing and confirm that rough electrical or mechanical work is complete before insulation begins. It also gives the crew access to important junctions where the roof meets exterior walls. Those transitions deserve careful attention because small gaps can allow a surprising amount of air movement. The suitable foam type and final depth depend on the roof design, available cavity space, vapour-control strategy, and applicable project requirements. Masking, ventilation, and controlled site access protect adjacent finishes and occupants during the work. When those details are handled correctly, roof-deck spray foam can combine insulation and air sealing in one continuous application, supporting comfort and efficient temperature control below.

Ask about this application

Improve the lower boundary

Crawlspaces & Foundations

Wall, foundation, and subfloor applications for the spaces directly beneath living areas.

Basement or lower-level walls and ceiling insulated with spray foam
02.01Basement Walls With Spray Foam Insulation

Photo details

Basement Walls With Spray Foam Insulation

This completed lower-level space shows spray foam installed between wall studs and ceiling joists before interior finishes are added. Foundation levels often feel colder because concrete, rim areas, and framing transitions can conduct heat and admit outdoor air. Applying foam to the framed assembly helps create closer contact with irregular surfaces and can reduce the hidden gaps that lead to drafts. The broad, uninterrupted walls in this image also make it easy to inspect coverage before drywall or another approved finish conceals the cavities. A responsible basement project starts by addressing bulk water entry, drainage, and foundation repairs; insulation should not be used to hide active moisture problems. The crew also plans around the electrical panel, window openings, garage hardware, and other components that need clear access. With the correct foam, depth, and protective finish for the assembly, basement insulation can make the lower floor feel more connected to the rest of the home and support a more consistent indoor temperature.

Ask about this application
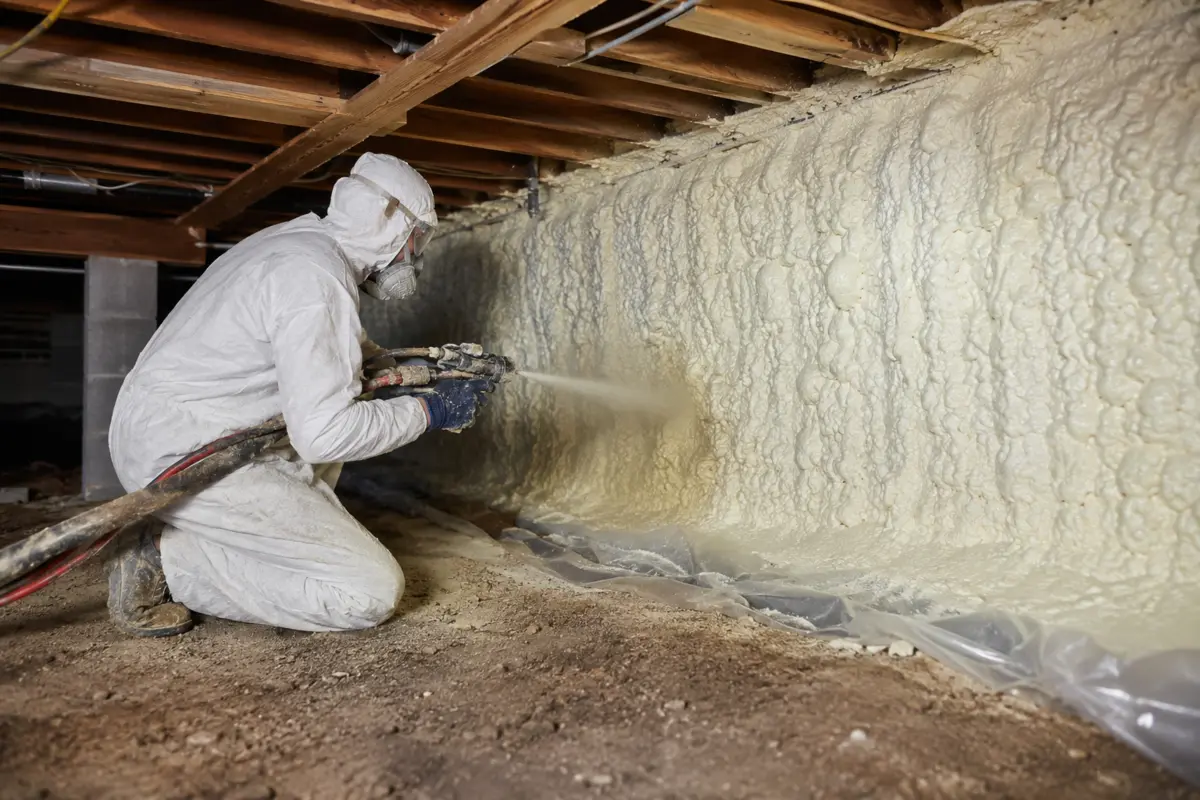
Protected installer applying spray foam to a crawlspace perimeter wall
02.02Crawl Space Installation

Photo details

Crawl Space Installation

This crawl space installation shows an applicator working along a rough perimeter wall beneath exposed floor framing. These low, confined areas can contain irregular masonry, pipes, wiring, vents, and rim-joist transitions that are difficult to seal with cut-and-fit materials. Spray foam can conform to those surfaces, but the overall crawlspace plan matters as much as the application itself. Drainage conditions, ground moisture, ventilation strategy, exposed soil, combustion equipment, and safe access should all be evaluated before work starts. The installer wears appropriate protective equipment and controls the spray pattern to build coverage while keeping required components clear. A ground membrane or other moisture-control work may be coordinated with insulation when the crawlspace is being enclosed. Once cured and protected as required, a continuous perimeter layer can reduce air movement beneath the home and help moderate the temperature of floors above. It can also make the boundary of the building easier to understand, inspect, and maintain over time.

Ask about this application
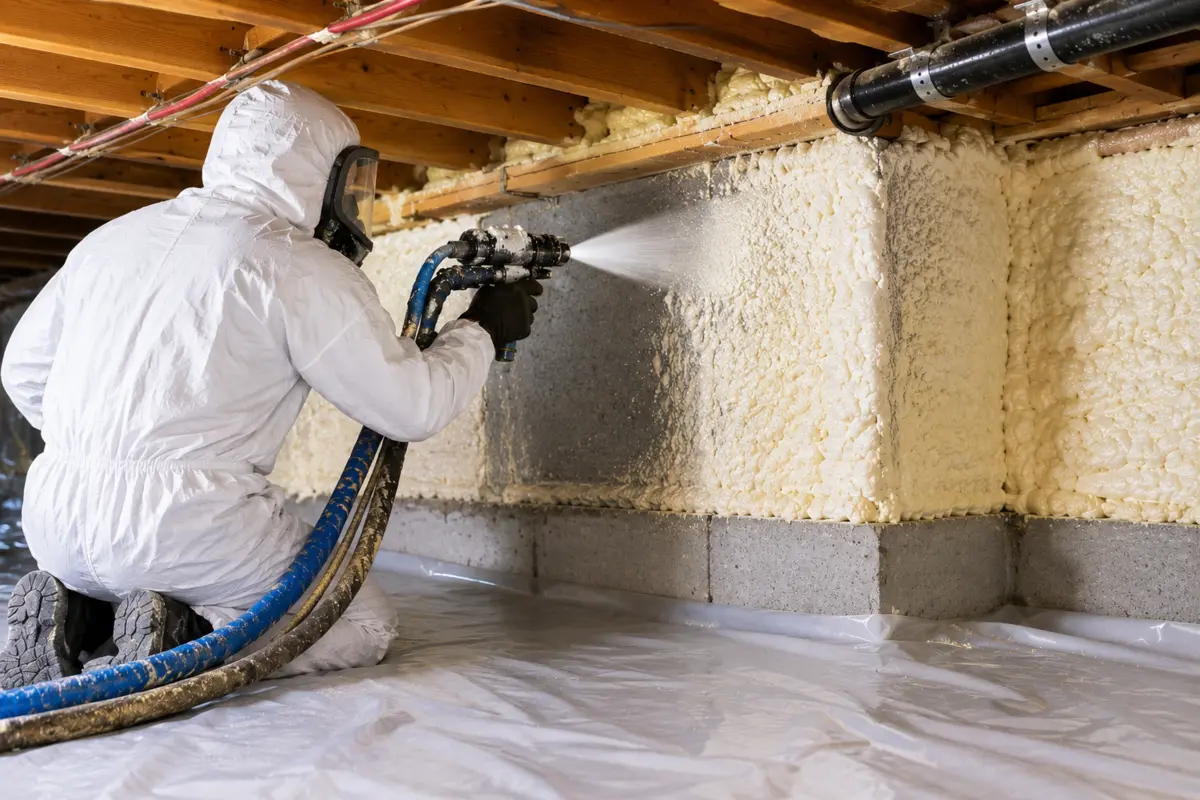
Installer spraying foam around crawlspace block foundation walls
02.03Crawlspace Spray Foam

Photo details

Crawlspace Spray Foam

This image captures spray foam being applied across a block foundation and the complex transition beneath the floor system. The wall includes changes in plane, wood framing, plumbing, and other penetrations, which are common sources of air leakage in crawlspaces. The installer works in overlapping passes so the expanding material can join into a continuous layer rather than isolated patches. The clean ground liner visible below is an important companion detail because controlling soil moisture is often part of a complete enclosed-crawlspace strategy. Before insulation, any standing water, drainage defects, pest activity, or damaged materials should be corrected. Mechanical and electrical equipment must also remain serviceable, and vents should be handled according to the chosen design rather than covered without a plan. When all of those elements are coordinated, wall-based crawlspace insulation can help protect the underside of the home from outdoor temperature swings and uncontrolled airflow. The result may contribute to warmer floors and more predictable comfort in the rooms above.

Ask about this application
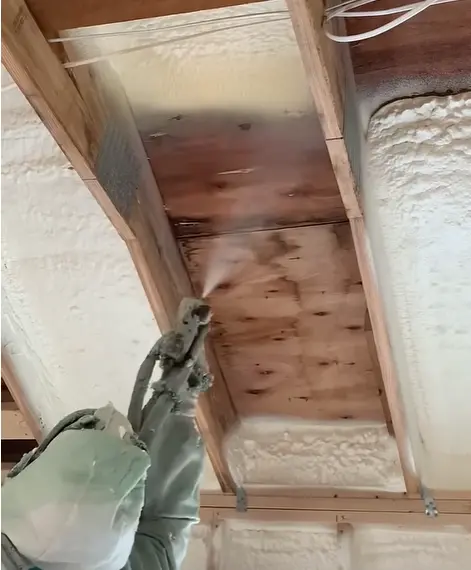
Installer applying spray foam to the underside of a wood subfloor
02.04Subfloor Spray

Photo details

Subfloor Spray

This upward view shows a targeted subfloor application between exposed floor joists. Insulating from below may be considered where a floor separates living space from an unconditioned crawlspace, overhang, porch, or similar area. The foam is applied against the underside of the wood sheathing and tied into adjacent insulated bays, helping reduce air movement through joints and framing gaps. Because the assembly is overhead, surface condition, moisture content, access, and installer technique are especially important for dependable adhesion and even coverage. Wiring, plumbing, fasteners, and future service routes must be identified before the material covers the surface. The team also determines how the insulation will connect to perimeter walls or rim joists so the work does not leave an unsealed edge. Foam type, thickness, vapour control, and required protection vary with the location and design. A properly planned subfloor application can help address cold floor complaints while preserving a clear, intentional boundary between conditioned and unconditioned space.

Ask about this application

Extend comfort beyond the house

Garages & Workshops

Roof and wall coverage for attached garages, detached shops, and working spaces.

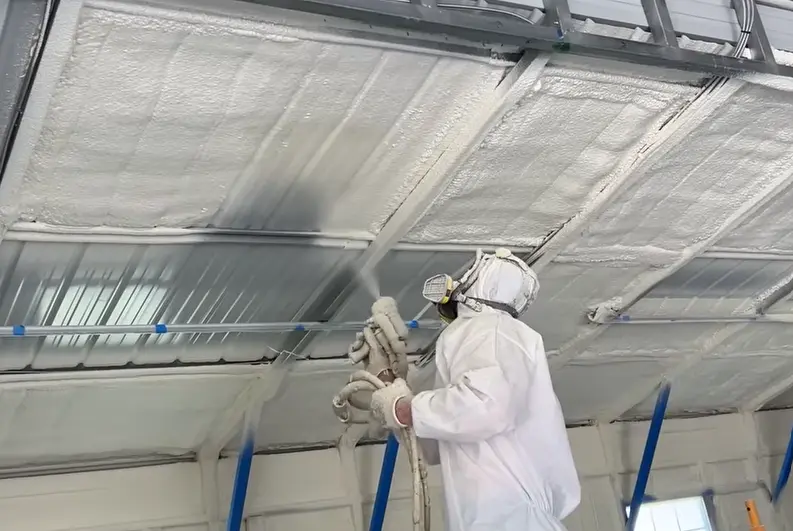
Installer spraying foam beneath a metal garage roof
03.01Garage Roof

Photo details

Garage Roof

This garage roof installation illustrates spray foam applied to the underside of a metal building assembly. Metal panels can respond quickly to outdoor temperature changes, so a continuous layer at the roofline may be used to improve thermal control and limit air movement through joints and framing transitions. The installer works overhead across each bay, carefully building coverage around steel members and service lines while protecting doors, windows, equipment, and finished surfaces below. Substrate cleanliness and temperature are important because the foam must adhere properly to the metal. The building’s intended use also shapes the recommendation: a heated workshop, storage garage, and occupied commercial space can have different insulation and protective-finish requirements. Ventilation, moisture behaviour, and interior ignition or thermal barriers need to be considered as part of the whole assembly. When the design is appropriate and the installation is consistent, roofline spray foam can help a garage hold temperature more steadily and become a more practical space through both winter and summer.

Ask about this application
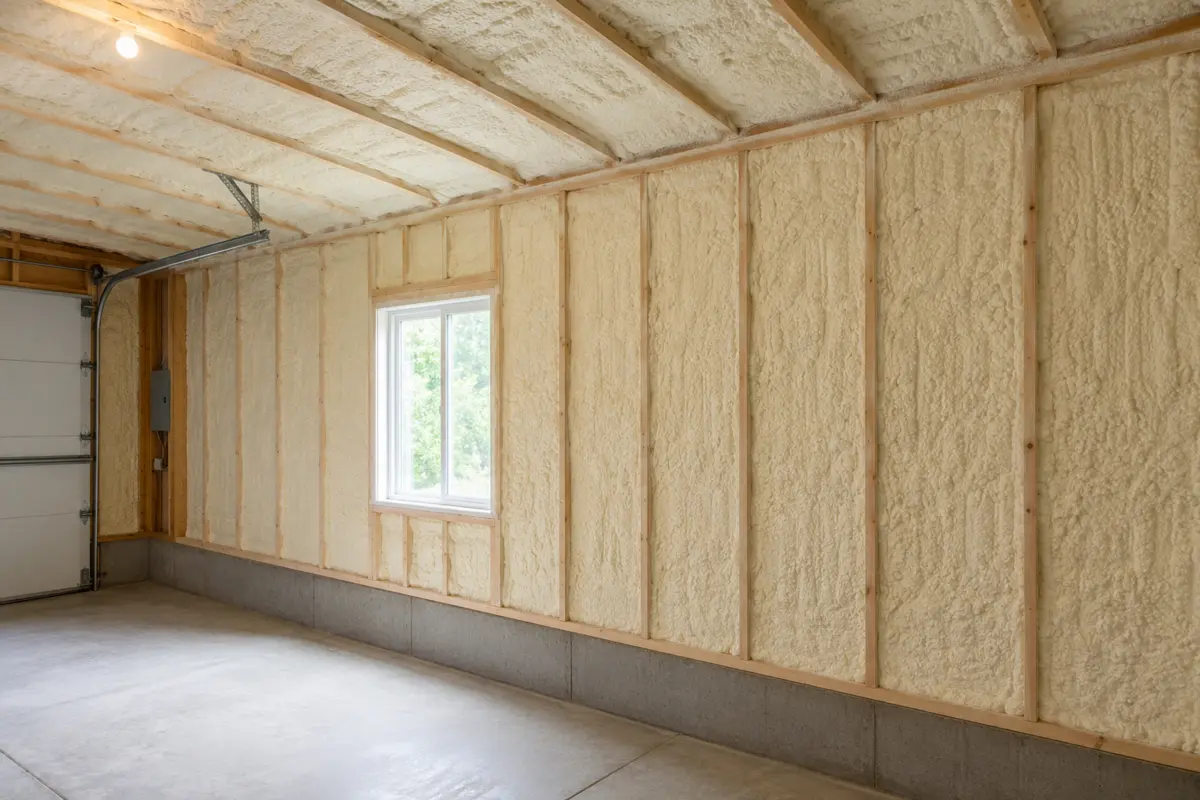
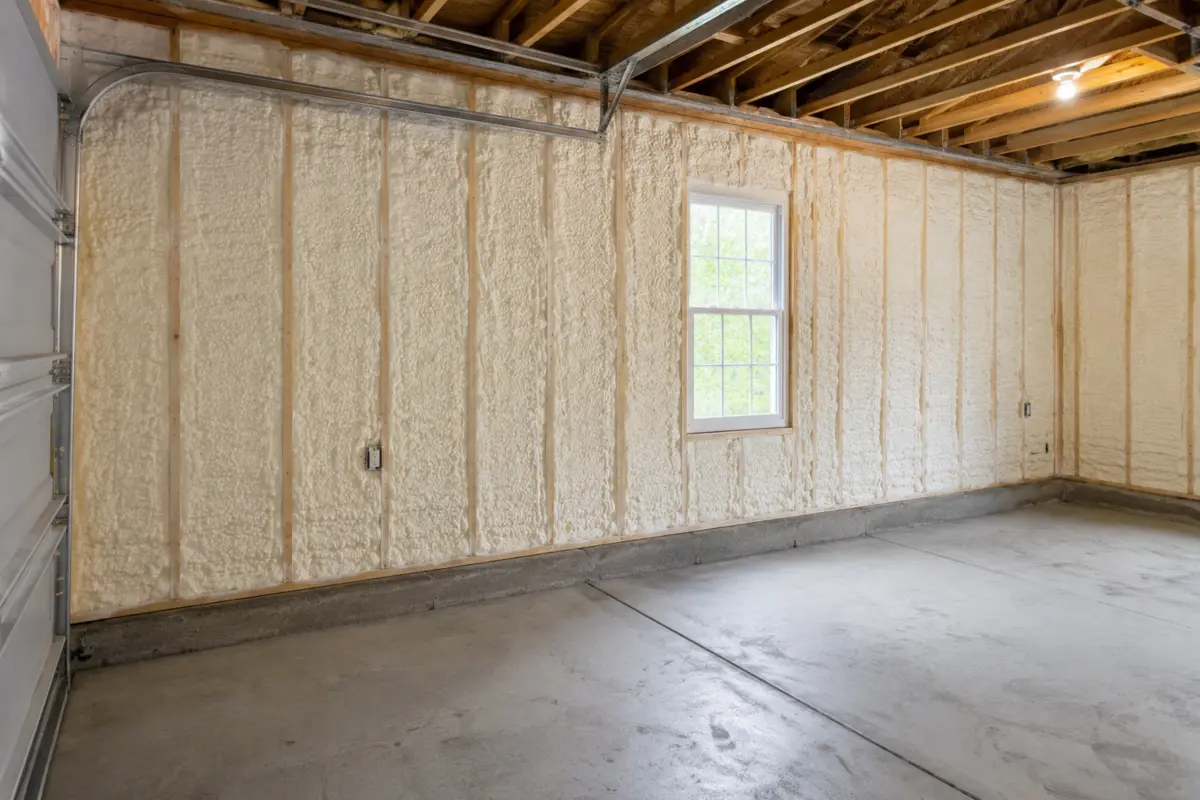
Finished garage wall cavities insulated with spray foam
03.02Garage Wall With Spray Foam Insulation

Photo details

Garage Wall With Spray Foam Insulation

This finished garage wall shows spray foam filling a long run of stud cavities around a window and electrical boxes. The open framing allows the installer and builder to inspect continuity before the wall is covered, including the narrow spaces beside openings and the joint where the wood wall meets the concrete foundation. Those locations can be difficult to detail with separate air-barrier and insulation products. In an attached garage, the boundary next to living space deserves particular planning for comfort, air control, and required fire separation. In a detached shop, the intended heating schedule and interior use help determine the most suitable assembly. The foam should be trimmed where needed so drywall or another approved finish can sit correctly, while boxes and service points remain clear. Doors, tracks, windows, and stored items are protected during installation. With the right preparation and specified coverage, insulated garage walls can reduce rapid temperature swings and make the space more useful for vehicles, projects, or storage throughout the year.

Ask about this application

Build continuity before closing in

Walls & New Construction

Open-framing views that show cavity filling, tall-wall access, and whole-building coordination.

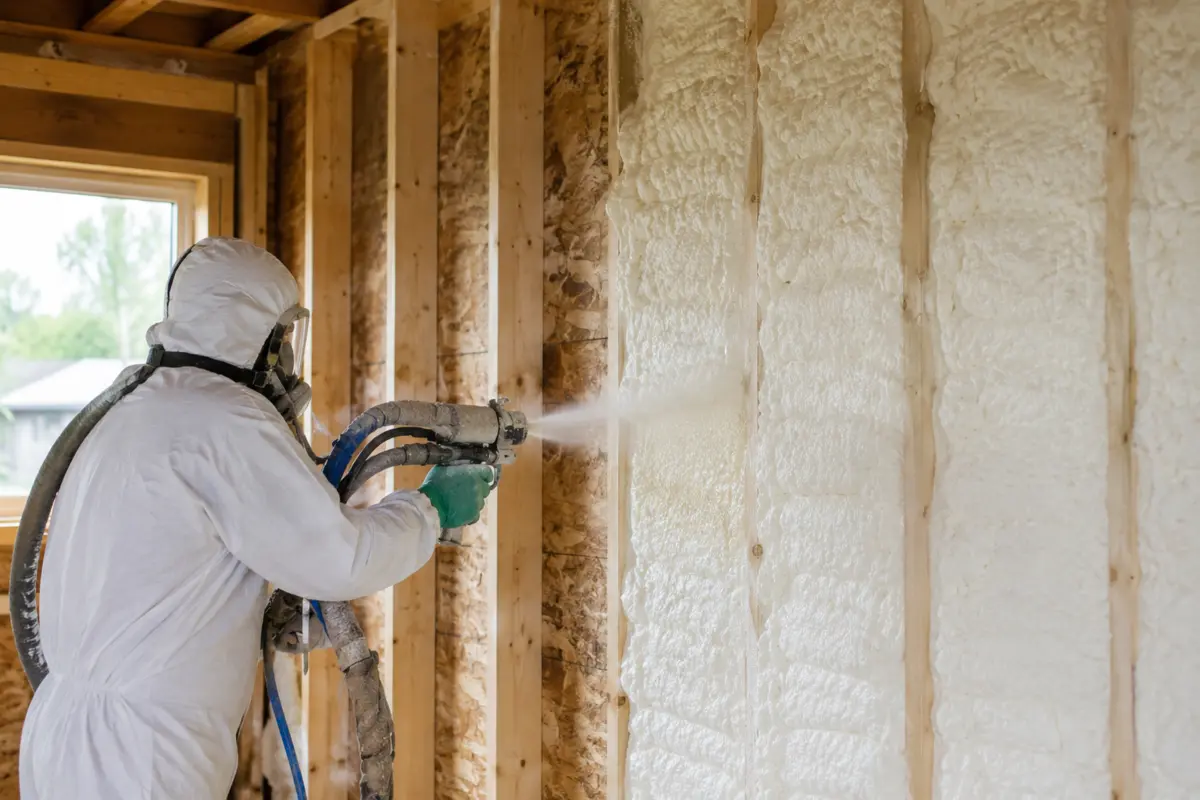
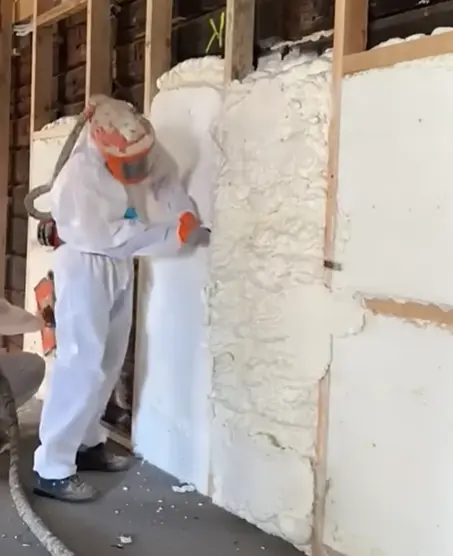
Installer applying spray foam insulation between wall studs
04.01Man Spraying Insulation Into Stud Wall

Photo details

Man Spraying Insulation Into Stud Wall

This wall installation shows the advantage of insulating while framing is fully open and easy to inspect. The applicator sprays into each stud bay, allowing the foam to expand against the sheathing and around the small gaps created by framing, fasteners, and adjacent materials. Windows and rough openings are already visible, so their perimeter transitions can be included in the air-sealing plan. Electrical and plumbing rough-ins should be completed, tested, and positioned before spraying to reduce later disturbance. The crew protects surfaces outside the work area, controls access, and builds the material in passes appropriate to the selected foam system. After curing, any excess can be trimmed so interior finishes sit flat against the studs. Inspecting the work before drywall helps confirm depth, adhesion, continuity, and clearance around components. For new homes and additions, this stage is an opportunity to connect wall insulation with rim joists, rooflines, and foundation details, creating a more complete building envelope rather than treating each cavity as a separate task.

Ask about this application
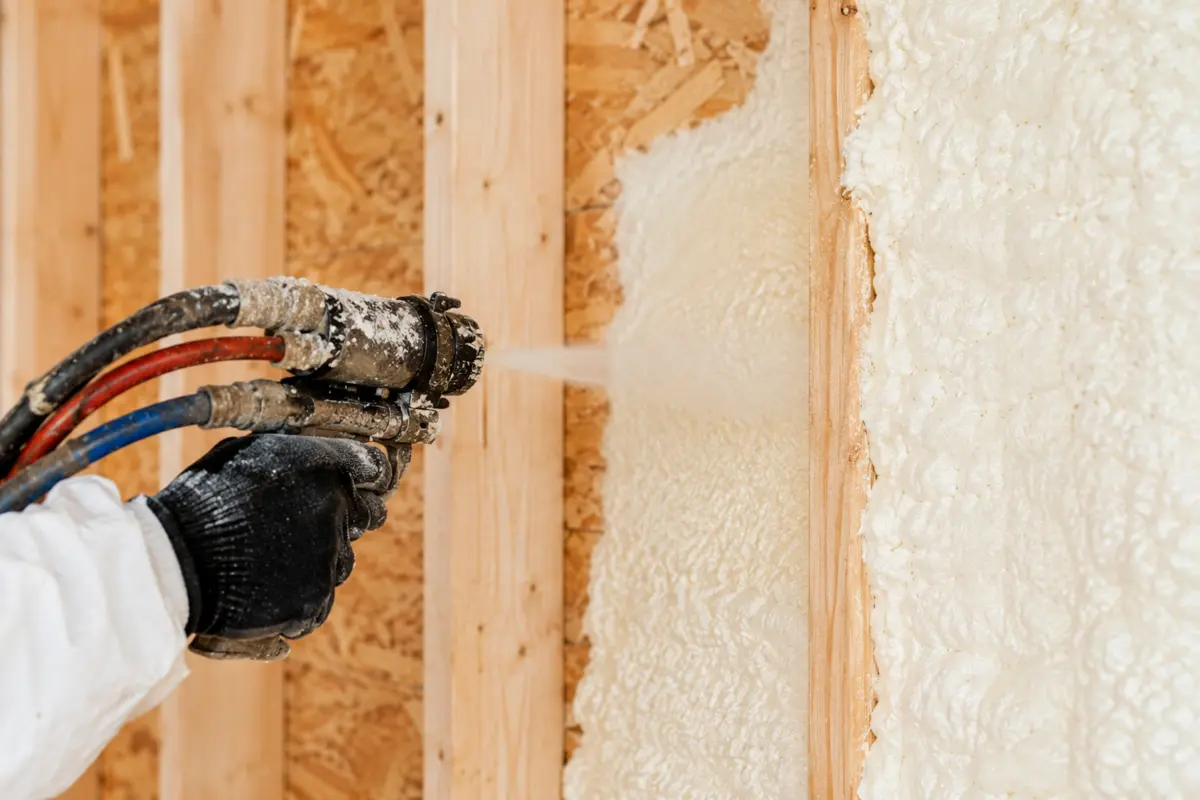
Close view of a spray foam gun filling a framed wall cavity
04.02Spray Foam Close-Up

Photo details

Spray Foam Close-Up

This close-up makes the application process easy to see. Two liquid components travel through the heated equipment and meet at the spray gun, where the material is applied to the prepared wall surface and begins expanding almost immediately. The installer’s distance, angle, pace, and pass thickness all influence how evenly the cavity fills. Rather than aiming for one heavy application, trained crews follow the product requirements and build coverage in a controlled way. The surrounding studs provide a useful visual guide for depth, while the already cured material shows the textured surface typical of spray foam. Conditions such as substrate temperature, cleanliness, moisture, and ambient air must be checked because they affect reaction and adhesion. Ventilation and personal protective equipment are essential during installation, and the area remains controlled through the specified re-entry period. This level of process control is what turns raw material into a consistent insulation and air-sealing layer ready for inspection, trimming where necessary, and the next stage of construction.

Ask about this application
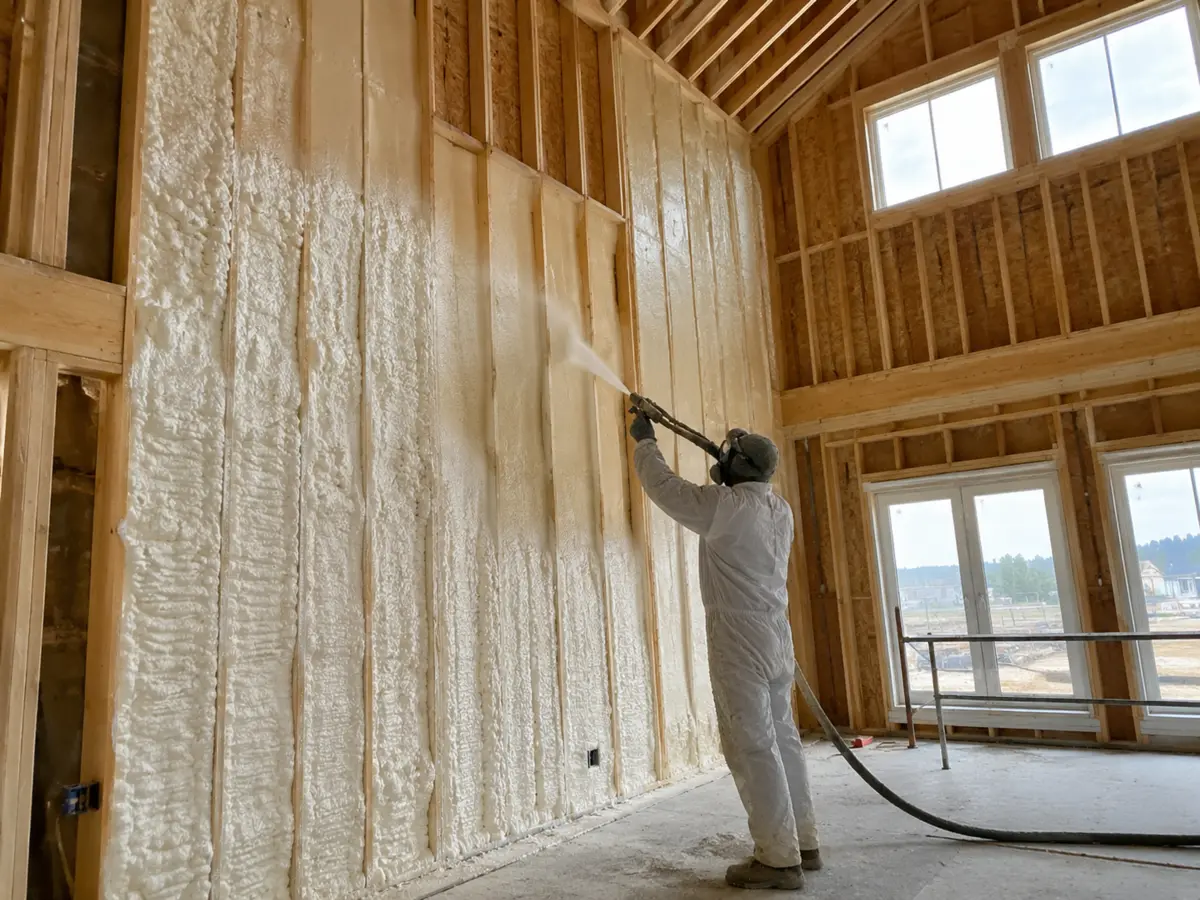
Installer applying spray foam to tall wall cavities in a two-storey great room
04.03Two-Storey Great Room

Photo details

Two-Storey Great Room

This two-storey great room demonstrates the scale and coordination involved in insulating tall new-construction walls. High ceilings, large windows, open roof framing, and changes in wall height create many transitions that must connect cleanly. The applicator works upward through each stud bay while maintaining a consistent spray pattern and safe access to elevated areas. Because the structure is still open, the builder can coordinate insulation after rough mechanical and electrical work but before drywall and interior finishes. Window perimeters, headers, corners, rim areas, and the wall-to-roof connection all form part of the same enclosure, so the project benefits from a whole-building plan rather than a cavity-by-cavity approach. The selected foam type and depth depend on the wall design and performance targets. Once the application is cured and inspected, protruding material can be trimmed as needed. Careful work at this stage helps large rooms with extensive exterior exposure maintain more even temperatures and feel comfortable across both levels.

Ask about this application
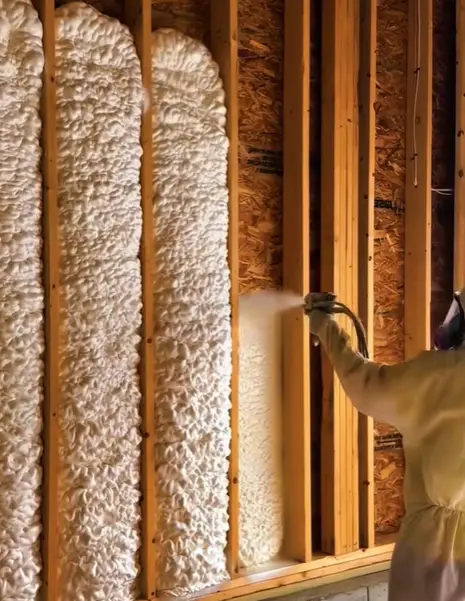
Spray foam being applied in tall wood-framed wall cavities
04.04Wall Studs 2

Photo details

Wall Studs 2

This tall wall view shows completed foam beside an active installation bay, making the expansion and cavity-filling process especially clear. The cured sections have grown from the sheathing toward the face of the studs, following the contours of the wood and filling narrow edges that can otherwise become air paths. The installer progresses methodically so each new pass joins the previous coverage without burying components that must remain accessible. Open framing provides the best opportunity to inspect blocking, corners, double studs, wiring routes, and the lower plate before finishes conceal them. Where foam extends beyond the stud face, it can be trimmed to create a flat plane for drywall. The assembly still needs the protective layers and finishes required for the building’s intended use. For a new home, addition, or renovation, this visible stage also allows the insulation work to be coordinated with windows, rim joists, and roof transitions. That coordination helps the wall perform as part of one continuous enclosure.

Ask about this application

Prepare for the next trade

Finishing Details

The trimming and inspection work that turns an insulated cavity into a finish-ready wall.

Installer trimming cured spray foam flush with wall framing
05.01Cutting Foam

Photo details

Cutting Foam

This trimming stage happens after the spray foam has expanded and cured within the wall cavities. In assemblies where the material reaches beyond the stud face, the excess is cut back so drywall, sheathing, or another approved finish can be installed on a flat surface. Trimming is more than a cosmetic step: it gives the crew a close view of the finished cavities and can reveal low areas, concealed gaps, or places that need correction before the wall is closed. The installer works carefully around studs, electrical boxes, openings, and adjacent materials to avoid damaging completed rough-ins. Removed foam and dust are collected so the work area is ready for the next trade. Depending on the application and occupancy, the cured foam may also require an ignition barrier, thermal barrier, or other protective finish. A clean, consistent cut makes inspection easier and supports orderly construction sequencing. It is one of the final quality-control steps that connects careful spraying with a wall assembly that is truly ready to finish.

Ask about this application

Your space is different

Let’s plan the right spray foam insulation.

Share what you are insulating and we’ll explain the preparation, spray foam type, insulation depth, and next steps that fit your building.